Thursday, November 20, 2008

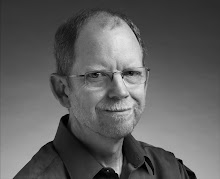
Bob Stevens and the Smart Smileys

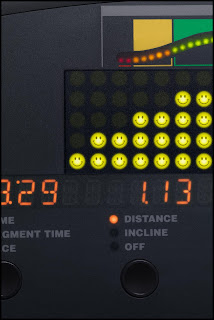
While working on a recent project with Bob Stevens we had an interesting challenge. As part of the Kaiser Health campaign for the ad agency, Campbell Ewald, we needed to create an image that featured the control panel of a cardio workout machine.

In keeping with Kaiser’s Thrive campaign the panel needed to show a series of happy Smiley Faces in place of the lights measuring the intensity of the workout. Now re-working the panel was pretty easy stuff but knowing Bob and the Art Director, Marge Bornais, I knew those 20 or so little happy lights would need to be tweaked and adjusted until they were just right.

Remembering that we had a pretty tight deadline, (what job doesn’t?), I decided it would be a lot easier to get one light looking great than 20. But of course Bob and Marge needed to see all the lights in place before they’d know if they were right or not. Hmmm….

This is where Photoshop’s Smart Objects proved to be the smart answer. You see one feature of the Smart Objects is that you can use it to embed one image into another. And when you change the embedded image it automatically will update in the file you’ve placed it in. What this means is that I could make the Smiley Face light as a separate file, place that in the cardio panel image as a Smart Object and make several copies of this Smart Object to build up the number of lights we needed in the image. So far pretty ordinary, right?

But here’s where the advantage came in, when I needed to change the Smiley Face all I needed to do was double click on one of the copies in the Layers palette, this opened up a separate image that had all the layers of my original Smiley Face. Then after I made the necessary changes to this file and hit “Save” Photoshop automatically updated ALL the copies I had made in the cardio panel.

Huh? All 20 at once? Yup! Just by changing one I could get Photoshop to do all the work of updating all the lights at the same time. Pretty smart, eh?

Wednesday, November 12, 2008

Wick Beavers & the Ascension

Florida photographer, Wick Beaver, had a problem. He was working on creating an updated version of Jesus’ Ascension for one of his clients but was having trouble getting the nail wounds in Jesus’ hands just right.

That was when Wick sent me the image looking to see what solutions I could see for his problem. While I’m not a trained illustrator working as a digital artist for nearly 18 years has taught me to look at images with an illustrator’s approach. And that experience proved to be just what I needed to create the ‘holes’ Wick needed.

Beginning with the idea of the hole itself I added an adjustment layer set to Multiply blending to create the illusion of depth. Then I thought about how the skin would look around the hole and added another adjustment layer to desaturate giving it just the right ‘deadness’. Some illustrated highlights around the edges helped a lot. This was followed by another adjustment layer that was painted in to create the bruises surrounding the wound.

After all that I felt something was still needed. Then I realized, it needed the right texture and shadow detail to really finish pulling off the effect. I grabbed a ‘comp shot’ of some meat and placed that into the holes using a layer mask to control how much detail was apparent in the wound.

Finally I sent a layered file back to Wick with the suggestion that he replace my rough shot of the meat. Rushing out to his compost pile Wick tells me he found some days old chicken breast and some bow tie pasta which he quickly shot and dropped in to finish off the image.

Here’s what Wick had to say about the collaboration:
“I had the great fortune and real honor of having Dennis Dunbar out in LA work the nail holes in the hands of Christ in my Ascension of Christ Ft Lauderdale photo. He immediately grasped the illustrative and kitsch nature of the task and returned me his 15+ layers, masks and adjustments to "get" the rotting, splayed back, bruised nature of the nail holes. Below is a close up of the forward hand. I attach a copy of the final full image as well for a look at the whole image. He left me a single layer he titled "MEAT", for which I shot week old chicken bones and bowtie pasta dug out of our nice compost pile. Yes, gross to the max, but worth the effort in the end!”